Sunday, May 5, 2013

Re-doing Plastic to Screen Windows

I have been camping in the yurt in some pretty warm weather, which made me finally decide that having clear plastic windows that can't open sucks! Its kind of like a green house effect. So today I started tearing out the plastic windows and sewing in a mesh layer. Now the windows are breathable but the clear plastic can still be stuck on via velcro strips, for colder days.

Yurt Screen Window
I laid a piece of tent mesh onto the window opening to start.


I got the mesh fabric from a tent repair place in Berkeley called Narain's on San Pablo. It was about $10/yd, but its really nice high quality stuff that all the good tents are made of. It's strong and doesn't rip. It is fabric, not the kind of mesh on screen doors, which is kind of metal.

Yurt Screen Window
I sewed the velcro strip on top of the mesh, to hold the mesh secure in place.


It was difficult working with the light and wispy mesh. It was hard sewing it onto the more stiff canvas without getting waves in the mesh. It took me a few hours to do one window, mainly because I spent a lot of time pinning the fabric in place, and fighting with the sewing machine! But the time and effort was worth it. I just kept thinking in my head: fresh air fresh air fresh air!!

Yurt Screen Window
After all the velcro strips were sewn, I cut the extra mesh.


The final step was to cut off all the extra mesh that stuck out past the velcro strips. Once I cut it away (with a seam ripper, which worked great!), the windows look very neat. I can't wait to test the new windows out!


Monday, February 18, 2013

Took the Yurt to Saline Valley!

My Yurt @ Saline Valley
Our comfortable set-up of the interior.


Its been such a long time since we took the yurt out to do some camping! But, the opportunity to take the yurt out for President's Day weekend in Saline Valley just could not be missed!! Before we packed anything for the trip, Romy and I took all of the yurt pieces out of the garage, brushed them off, and put them on the roof rack of the Subaru. This took only about one hour, which was a lot shorter than I expected. Hey, I guess lugging around a yurt that was designed to be portable is actually not that bad!

My Yurt @ Saline Valley
We didn't bring the cots to sleep on this time.


I stopped at the store (Home Depot) to make sure I had enough rope for this trip. I found some nice 50ft and 100ft long colorful synthetic rope that already came on their own plastic spools. I bought 4 spools, and man did that make setting up the yurt really a lot easier this time! No more bunching up the rope while weaving it between khana. . . . its already nicely wrapped, and the spool of course is re-usable.

While driving to Saline Valley, we noticed the Subaru was quite top heavy. We've never weighed the yurt out right, but I am guessing its at least 200 lbs of total weight on the top of the roof. Canvas can get quite heavy, and so are the khana! Anyways, when we arrived by the springs, we made sure to pick out a nice and level spot. We eventually found one between some creosote bushes. As we set up this time, we had a few new techniques we wanted to test out.

My Yurt @ Saline Valley
The khana are all set up, perfectly round this time!


In the past, we've spent so much time trying to get the khana set up in a perfectly round shape. This time we used a very simple but effective technique to make sure we got it. I cut a piece of rope that was 6 ft long, equal to the radius of the yurt. Then I attached two metal stakes, one to each end. I put one end securely into the ground where I wanted the center of the yurt to be. Then I dragged the other end along the ground, making an outline of a perfect 12 foot diameter circle. I dragged it around and around so that the circle was well marked. Conveniently, this method could be used when picking out a yurt site too! Sometimes the size of a camping site can be tricky to eyeball. If you do this circle drawing technique, you will know for sure if the yurt will fit in the spot or not. Very simple and very quick!

My Yurt @ Saline Valley
All set up - time for a break on our front porch!


I regret not taking more pictures during the set-up process, which could have shown in more detail how we did it. But dragging a rope around in a circle is pretty simple enough. We also used some extra stakes to hold the khana in place before it was all roped together. I just hammered a bunch of stakes that straddled the bottom of the khana pieces in certain places to keep it from bending outward. The stakes were temporary - I took them out once we got the khana and door frame all roped together.

My Yurt @ Saline Valley
The view from the front door was amazing! Romy peeks inside.


This was by far the best set-up we've done together. All it took was some extra (by super simple) steps in the set up to make sure the yurt was perfectly round. After we were all finished, we took a nice long break. We deserved it! It took almost 3 hours! We even set us up a little front porch area, lined with pumice rocks. We had the best view from our front porch. Wow!

Our View
Can anything beat this view!?


We found another homemade yurt camping at the springs that weekend. Of course we went to check it out. The owners (Ken and Tiffany) made the yurt out of recycled materials. The outside is made of old plastic billboard material. It was designed a little bit differently than mine. They had an awesome mesh wall that went all the way around, underneath the outer wall. The outer wall was able to roll up and expose just the mesh section for some ventilation! What an incredible idea! What was even more awesome was that they let us go inside and check it out. Ken told me when he was designing his yurt, he actually found this blog and so he recognized my yurt when he drove past it before meeting me. Small world!

Another Handmade Yurt!
We found another homemade yurt (Ken and Tiffany's) that weekend. It was super cool!


After camping in the yurt for four days and nights, and after checking out Ken's yurt, we had a bunch of ideas that we now want to try. The biggest thing is that I want to re-design how the floor works. I also want to make a solid wood door, make hanging mini shelving, and improve the ventilation situation. So many ideas! I will be updating the blog as I make each improvement. I can't wait to get working on the yurt again!

Another Handmade Yurt!
A close up of the mesh ventilation on Ken and Tiffany's yurt.


Monday, May 31, 2010

The Yurt in Stanislaus - Rain!


Yurt Frame
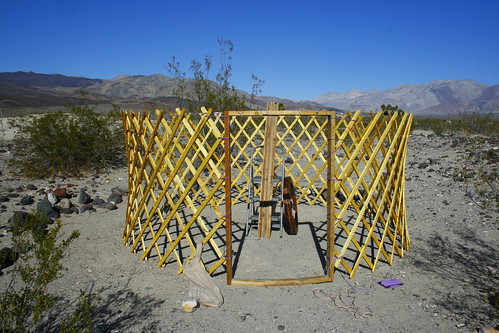
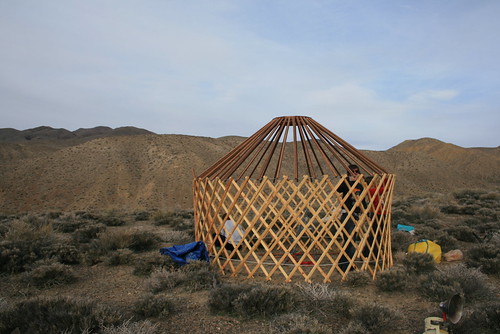
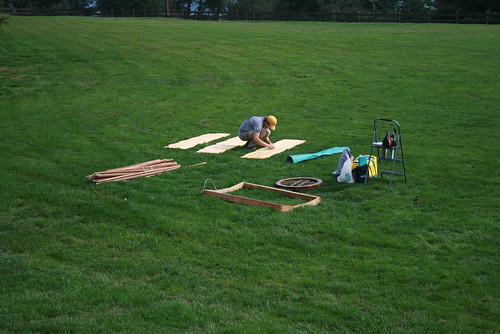
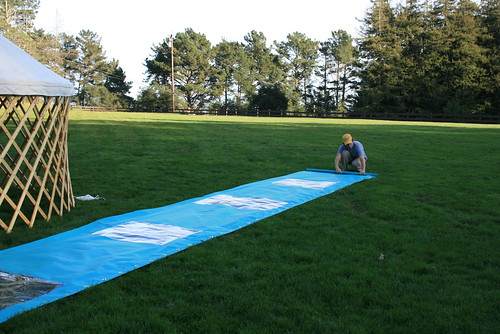
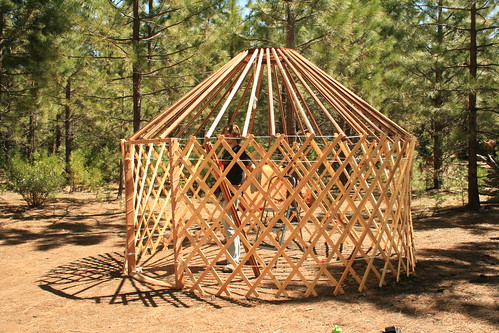
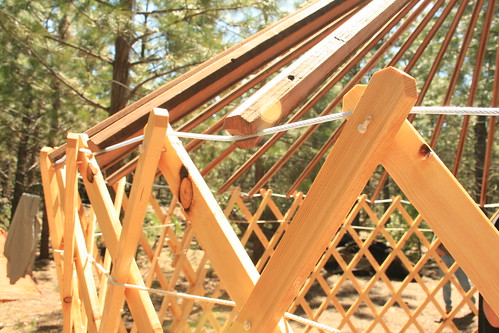
Setting up the yurt frame on a nice level area.


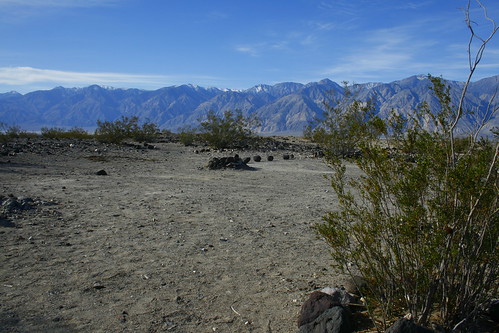
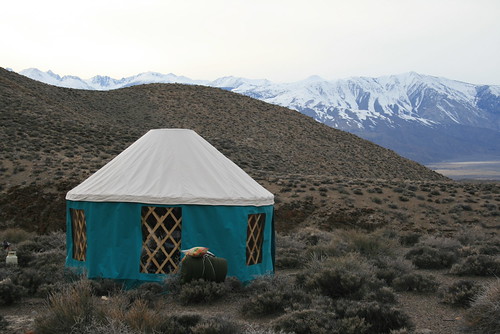
I finally got another chance to take the yurt camping, this time in the Stanislaus National Forest near the Hwy 120 entrance of Yosemite National Park in California. My dad and I searched for hours, driving down national forest roads, to find the perfect spot to set it up. We encountered a lot of steep terrain which was not ideal to set up the yurt, since it needs to be as level as possible. If the ground isn't level, then the roof will end up pushing down more on the khana downslope, causing uneven stresses on the frame. We were also looking for a spot with flat ground (not bumpy) and cleared of vegetation. We finally found a spot near Camp Mather, off of Evergreen Rd.


Yurt Frame
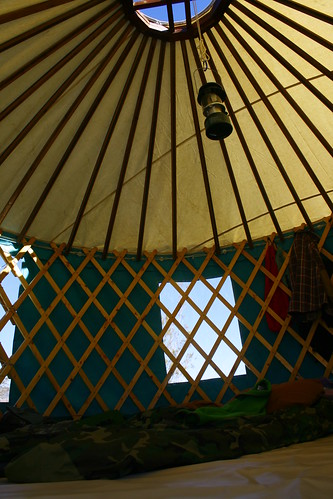
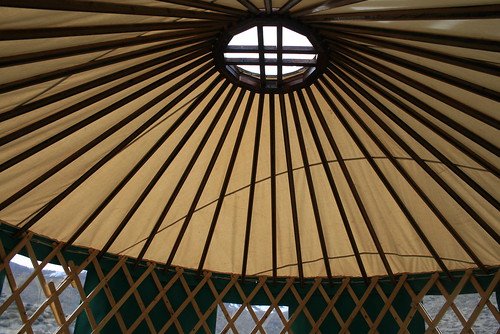
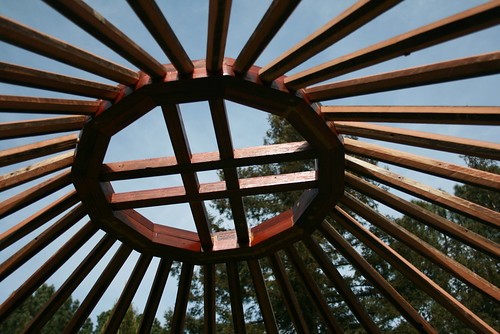
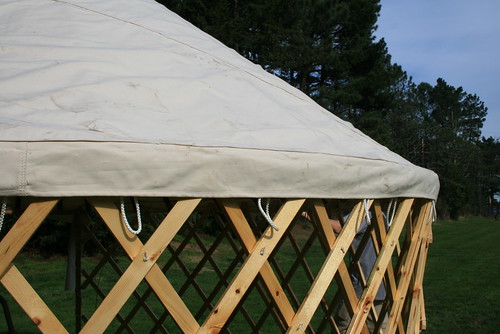
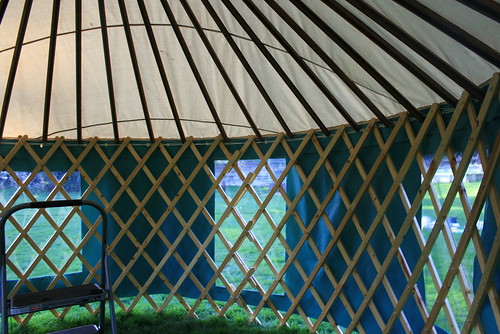
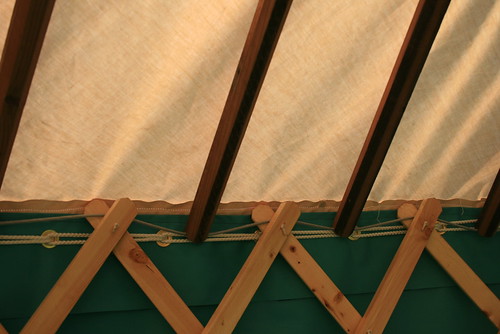
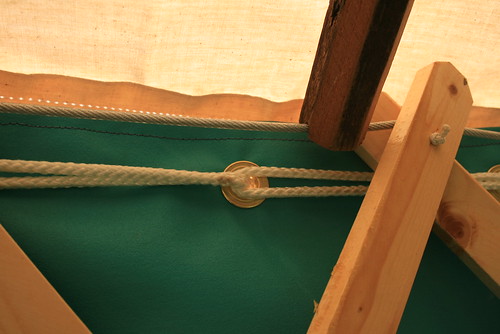
A close up of how the roof poles rest on the tension cable.


Unfortunately, before we got everyone together at our campsite, it was already past midnight. We spent the whole day looking and didn't get everything together to start building the yurt until after dark. So we slept in tents and the next morning, we started building. We had plenty of time, and spent about two hours putting it up. Even though we tried building the yurt on a spot as level as possible, the ground was still slightly at an angle, but what can you do? We built the door downslope so that our heads when we sleep inside the yurt would be away from the door.


Yurt in Forest
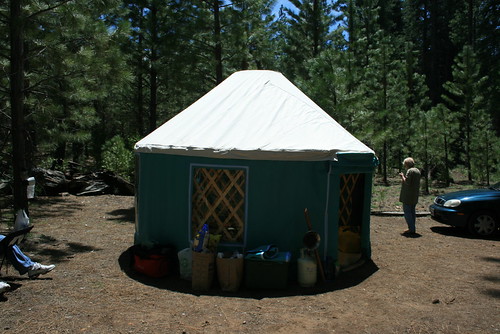
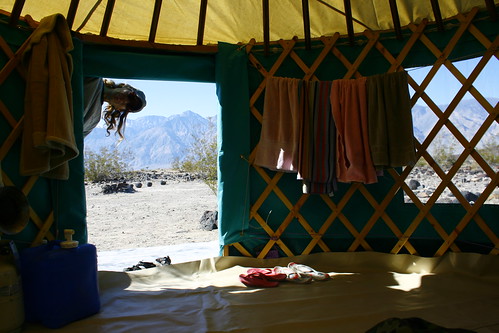
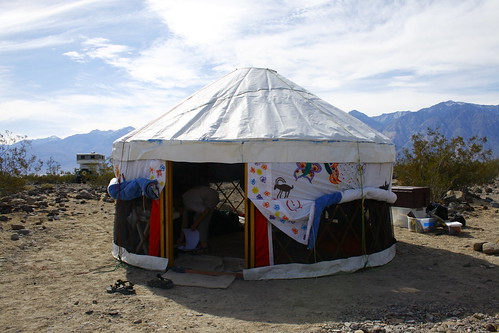
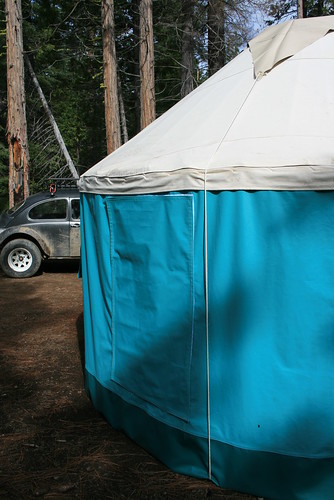
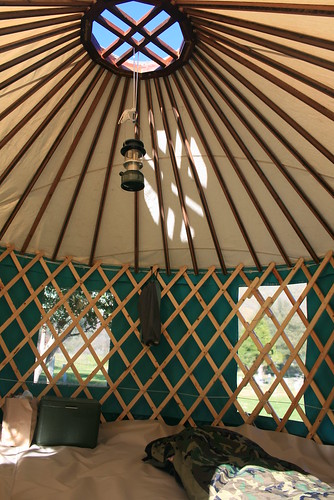
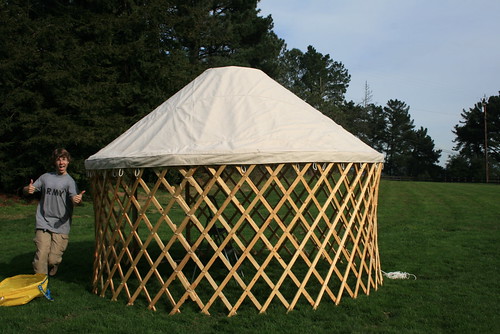
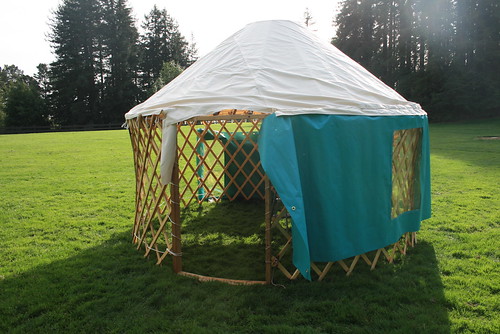
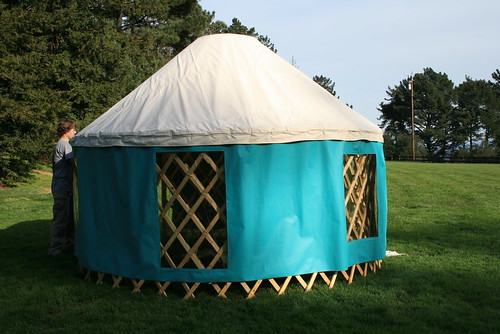
All done! The door is rolled up.


Yurt Door
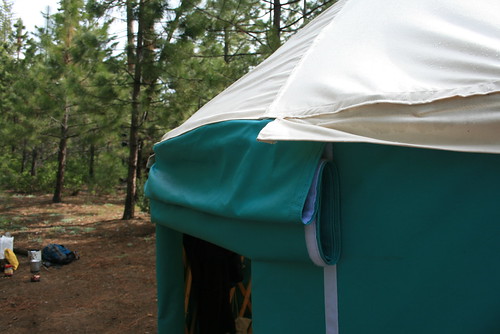
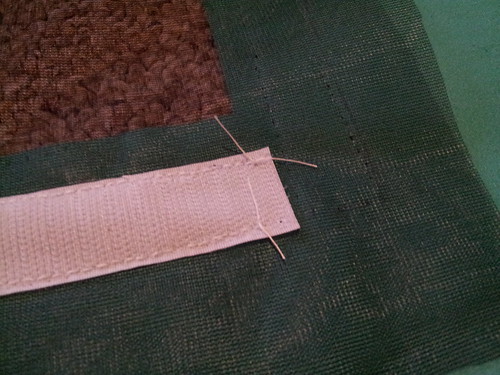
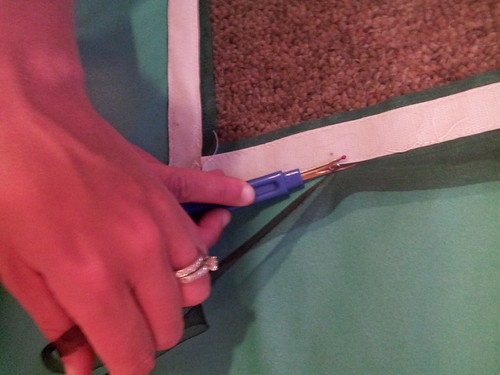
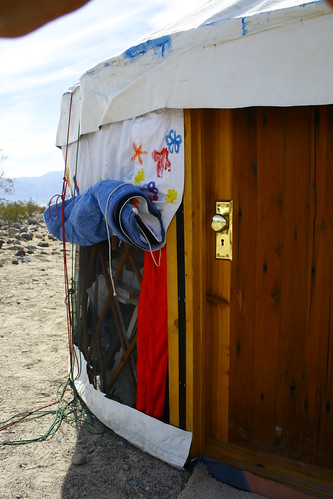
Close up of the rolled up door.


We also tried a new way of rolling up the door. It was pretty simple, in fact. All we did was roll up the door from the outside, and then unfold the roll at the top so that some of the velcro was stuck to the velcro of the walls. This small amount of velcro (about 3-4 inches) was strong enough to hold up the entire rolled up door. It worked well, and we didn't need any ropes to cinch it up as we originally thought. Also, the Sierra Nevadas are a really dry mountain range with few bugs, so we were able to keep the door open all day and the only bugs that crawled into the yurt were a few large ants. If we end up taking the yurt anywhere else, I will consider making a screen door insert.


Yurt in Forest
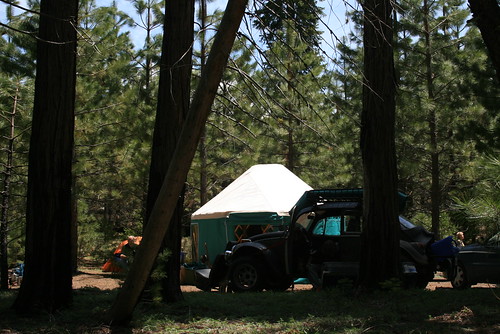
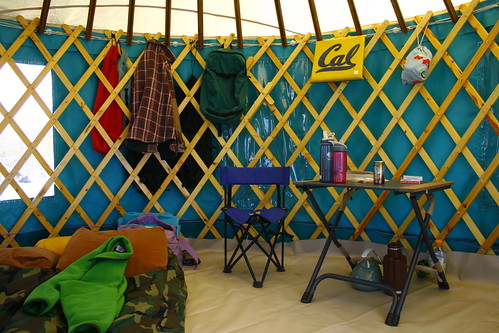
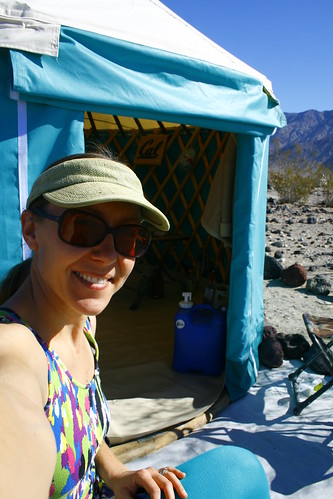
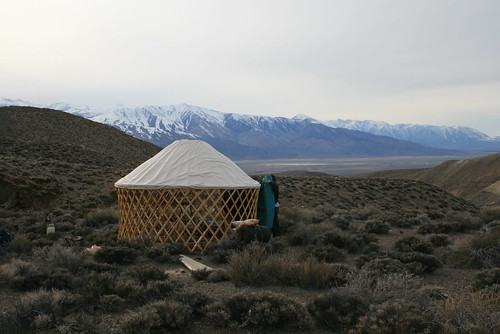
Our camp spot in the forest.


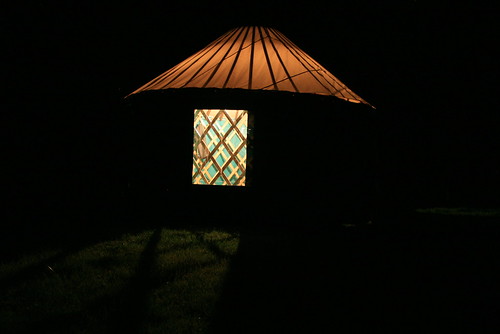
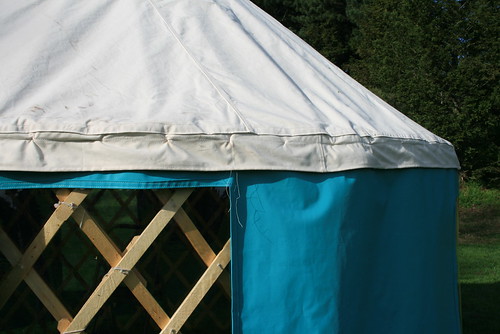
Now, as the title of this post suggests, it rained on the yurt while we were camping. It didn't rain really hard, but it did drizzle for a few hours, and there were interspersed periods of heavy rain that lasted 1-5 minutes. I was very excited when it rained because this meant I would be able to see how the yurt stood up to the water, and if the canvas was really as water resistant as I've heard. My mom was relaxing inside of the yurt at night while it was raining and she said the sound of the rain on the roof was very relaxing. The rain drops that hit the canvas balled up and rolled off. The canvas soaked up very little of the water. The area where the most water was actually soaked up by the canvas was at the roofline where the canvas was stretched tightly around the end of the roof poles at top of the walls. Some dirt got splashed up off the ground and hit the bottom band of the yurt wall. But since this section was made of vinyl, it was easy to wipe off. The walls also got wet, but the water just rolled down and never soaked in. The next day was sunny and warm, so the yurt dried out completely.


Cot in Yurt
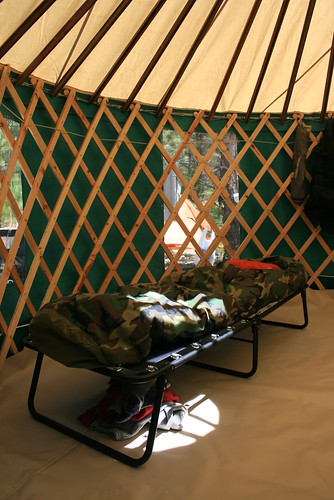
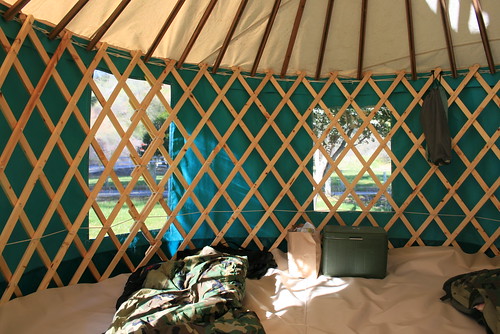
Setting up the cot inside.


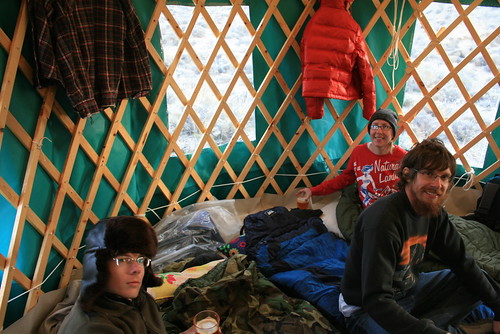
Another thing we tried for the first time is sleeping on a cot in the yurt. This was actually really nice and made it feel like a house or cabin in the woods rather than a fancy heavy duty tent. Sleeping on the ground still makes you feel a bit more like you're camping in a tent, but the cot was great. It also added the benefit of putting stuff under the cot which freed up floor space.


Yurt Windows
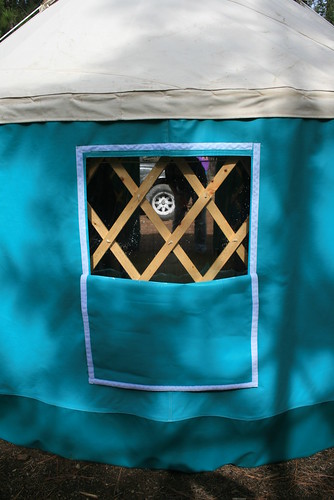
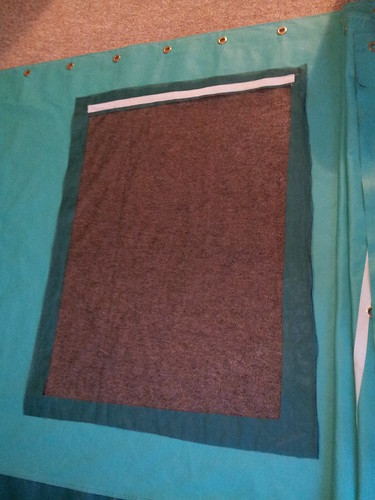
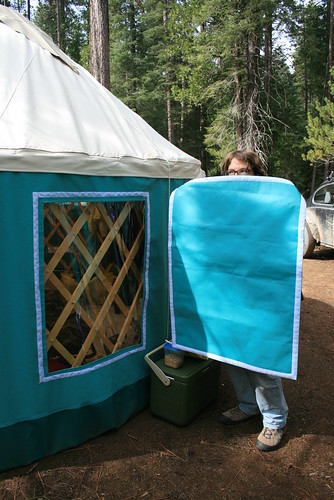
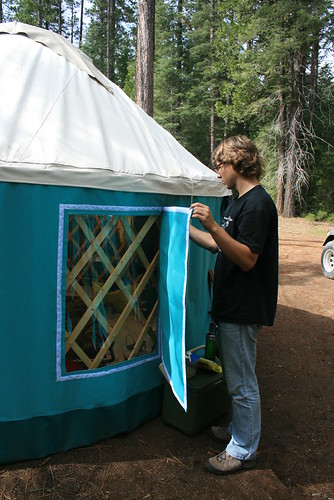
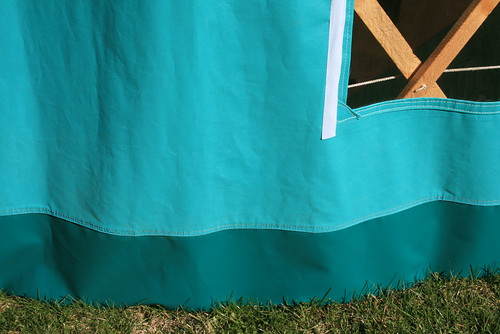
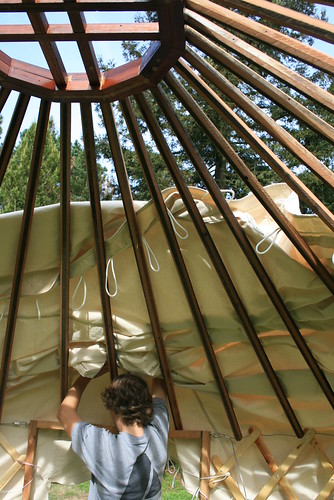
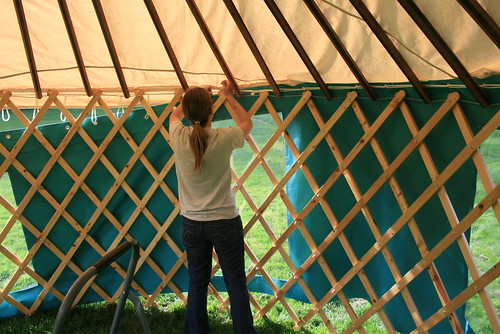
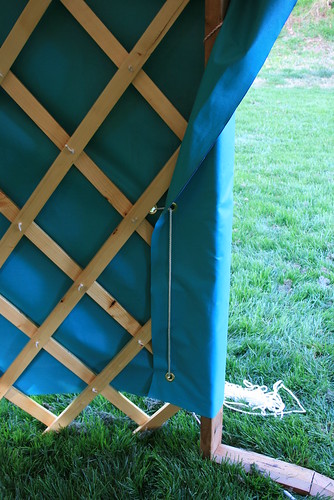
A window cover halfway on.


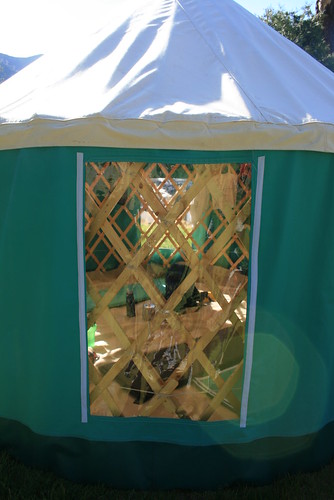
Since it was hot during the day, about 75 degrees and sunny, we wanted to keep the yurt as cool as possible, which was hard since it was in the direct sun around noon. We tried covering the south facing windows with the window covers I just finished before we left on the camping trip. This worked pretty well, and kept the yurt a lot cooler than if the windows were open to the sunlight.

Finally, as we packed up, we noticed that the ground underneath the yurt was really moist, probably from all the rain and the recently melted snow in the area. The vinyl floor and the vinyl bottom band of the walls were very wet when we were packing up the yurt and some parts were covered with mud and wet soil. This shows the importance of the vinyl bottom band, because it doesn't allow the water in the ground to be soaked up by the canvas of the walls since vinyl doesn't absorb any water. It was very easy to take a rag and wipe down the mud/water from the vinyl floor and bottom band when we were packing up, ensuring that the yurt was packed away dry.

Friday, May 21, 2010

Yurt Window Covers

One of the last things I just finished on the yurt are the window covers. Since I sewed the clear plastic directly into the wall cutting out the canvas material, I had no way to cover the windows unless I made covers. I thought about different ways to attach the window covers, like heavy plastic zippers, rope and grommets or velcro, and the velcro won. It also made the most sense to attach the window covers on the outside of the yurt, which at first sounds inconvenient, but its not actually that bad. Attaching the window covers on the inside would be nearly impossible since the khana are in the way between you and the canvas wall and windows. If you want to open up the window covers to let in light in the morning, you have to go outside. Also, if somebody walks by, they can just yank open a cover an look in. But so far, I haven't encountered any weirdos in the middle of the forest that have done that. And usually in the morning when I need a bathroom break in the woods, thats also a good time to open up the covers to let some light into the yurt.


Yurt Windows
Close up of the velcro that attaches the window covers.


I started by sewing the hooked part of the velcro strip onto the canvas wall bordering the windows. Then I measured out a slightly over-sized piece of canvas which would be the actual cover, and hemmed the edges. Finally I sewed the fuzzy soft part of the velcro strip around the edges of the canvas cover. I chose to put the hooked side on the yurt wall because it is easier to clean if the wall gets dirty. The covers have a better chance of staying clean.


Yurt Windows
The first step is to get the window cover aligned with the window.


I started experimenting with different ways of attaching the covers over the windows. Since they attach with velcro, you can slap then on almost any way you like. The best option I found was to put the window cover on completely, and then peel back the cover until you expose enough of the window to let in as much light as you want.


Yurt Windows
The second step is to stick the window cover onto the window and press the velcro together so it sticks.


Yurt Windows
A window covered by its cover.


Yurt Windows
Peel back the window cover until you have enough light coming through the window.


Yurt Windows
This is what a half peeled down window cover looks like from the inside of the yurt.

Monday, March 15, 2010

The Yurt at Cache Creek

We set up the yurt for a single night of camping, something we normally wouldn't do because of the 1-2 hr set up time, at the Yolo County Cache Creek campground when we went camping with the vwcamperfamily. John LaTorre was going to be there, the guy who lent me the industrial sewing machine, so we thought we'd set it up and show what I sewed with his machine.

This time, we were able to set the yurt up on semi-level ground. That made the shape much rounder and the wall was less saggy then when we set it up in the desert. We also finished partially sewing on some velcro for attaching the window covers. Here are some pictures:


My Yurt at Cache Creek
The yurt set up with the door flap closed.

My Yurt at Cache Creek
Two strips of velcro that hold the window covers on (but only partially)

My Yurt at Cache Creek
The vinyl bottom band is tucked under the khana. Canvas doesn't touch the ground.

My Yurt at Cache Creek
Inside the yurt, with the ground cover all wrinkled up.

My Yurt at Cache Creek
We hung the lantern from the crown by a rope.

Night at Cache Creek
The yurt at night. The rest of the windows are covered by the window covers.

Monday, March 8, 2010

Maiden Yurt Voyage: Have Yurt, Will Camp


Warm Springs Rd
Yurt on the roof of the baja, heading into the mountains!


The day had finally come when all of the months of work on my yurt came to a finish (not exactly) and we were able to pack it up and take it to the mountains on its maiden yurt voyage. I know, I could of taken it somewhere easy and simple, like the local campground or something, but as with most of the things Romy and I seem to do, we go big or go home! So there we were, driving the baja over to the Eastern Sierra.


Baja-ing
Driving off-road in the Inyo National Forest to find a perfect spot to set up the yurt.


We picked a spot east of the Owen's Valley, in the Inyo National Forest, just outside of Death Valley National Park. We found an off shoot road from CA 168 out of Big Pine which headed into Death Valley, called Death Valley Rd, and it was off another off shoot road where we drove the baja off road into a canyon and found a nice place to set up on the top of a ridge. We were situated at about 5,500 ft with an awesome view of the Sierra Nevada mountains across the Owen's Valley. Before we left on the trip, I had visions in my head of setting up the yurt in the valley near Mammoth Lakes, CA, but it had too much snow. That's why we headed farther south instead.


Maiden Yurt Voyage
Setting up the yurt near Death Valley National Park.


Nicole and Romy found a section of a ridge that happened to have large flat spots in between desert scrub plants (I don't know what they are called). We needed to find a place that had at least a 12 foot diameter circular area clear of vegetation. We ended up having to pull a few plants out of the rocky and dry soil to clear one of the largest spots we found, but made an attempt at replanting them elsewhere. So hopefully we didn't kill any plants! The baja couldn't drive up the ridge, so we had to carry the pieces of the yurt up a steep hill. It was worth doing that in order to have the awesome view that we were able to have being on top of a ridge.


Maiden Yurt Voyage
Marcel holding the yurt wall as it is attached to the roof.


There was a steady wind blowing from the east as we worked to get the yurt put together. It took us about 2 hours to put it up, which was slow compared to how fast we were able to assemble it in the park. It was hard to get the yurt completely flat and level of the ground and perfectly round. I don't think we were ever able to achieve the round-ness and I also think we constructed it slightly less than a 12 ft diameter. But it was close! Consequently, I felt like the walls of the yurt were slightly sagging or bunched up in areas. However that didn't effect much except the aesthetics, so as the sun went down, we crawled inside and started up the lantern for light, and propane heater for warmth.


Maiden Yurt Voyage
The yurt, finally all built!


Maiden Yurt Voyage
Romy, Marcel, and Nicole relaxing in the yurt.


The yurt retained a lot of heat from the propane heater, which we nicknamed "the sunflower" due to its shape. We left the door flap cracked open for ventilation. We had it running the whole evening, but turned it off when we went to sleep, and turned it back on in the morning. Nicole and Marcel brought a bunch of 1 liter bottles of home brewed beer, which we drank merrily each and every night of camping in the yurt. Mmmmm. My favorite was the blonde ale.


Yurt Party!
Cheers! Enjoying a home brewed beer in the yurt.


When the sun went down behind the mountains, we were able to see a lot of stars in the sky. We hung a Coleman lantern from the crown by a short rope, so we had a soft light source inside the yurt, and it looked really cool from outside. I wasn't able to sew window covers yet, however I will have to finish them this week! The wind steadily blew all night, but inside the yurt it was quiet and peaceful. When we finally went to sleep, I liked laying and staring at the roof. There was enough light outside from the moon that you could see the roof poles and the star shaped crown rain cover through the roof making a cool pattern.


Maiden Yurt Voyage
The yurt at night, lit up by our Coleman lantern inside.


After having the yurt up for only two short nights, we had to break it down and go home. Putting it up for the first time and camping inside of it was really exciting and made me feel great after all of the hard work building it. I feel like I'm done, but there are still a few things here and there that I have to finish off, like the floor, and the window covers. But nevertheless, its ready for another camping trip soon!


Maiden Yurt Voyage
Inside the yurt, with an open crown.

Thursday, February 18, 2010

Yurt Almost Done!

Before my sister, Nicole, left we put up the yurt at the park to see how well everything we sewed went together. This post will mainly be pictures, since they explain a lot more than what I could say in words.


Yurt 02-16-2010
Romy setting the pieces of the yurt out in the grass. It really helps to have a step ladder.


Yurt 02-16-2010
The redwood crown.


Yurt 02-16-2010
Romy pushing the roof canvas on top. Its actually pretty heavy!


Yurt 02-16-2010
Alright! Romy gives thumbs - the roof fits and the roof band is tight.


Yurt 02-16-2010
A close up of the roof and roof band. You can see some of the rope loops hanging down - that's where the wall will attach.


Yurt 02-16-2010
Unrolling the yurt wall. You can see all of the windows are sewn in. The wall is 36ft long.


Yurt 02-16-2010
Nicole attaches the wall to the roof using the loop-rope system. The wall must be attached from the inside of the yurt by design.


Yurt 02-16-2010
The roof had to be pushed up while tying the wall to the roof.


Yurt 02-16-2010
The wall wraps around the door frame and is tightened with rope.


Yurt 02-16-2010
The wall is fully attached. The bottom band isn't sewn on yet, that's why the wall is just short of the ground. The bottom band will be made out of vinyl which will not absorb water and rot.


Yurt 02-16-2010
An outside view of the yurt. You can see the two sizes of windows.


Yurt 02-16-2010
The roof line and a window.


Yurt 02-16-2010
You can see in this picture how the walls attach to the roof. The loops of rope interlock with each other as you feed them through the grommets. The wall is not supported by the tension cable, as many popular designs call for.


Yurt 02-16-2010
Close up of the rope loop system.


You might notice that the yurt doesn't yet have a door flap and the wall doesn't reach all the way to the ground. I still have to complete the bottom band, which will extend the wall to the ground and connect to the vinyl floor (still have to make the floor to!) with velcro. I have to finish this all in the next two weeks because that's when the maiden yurt voyage will be to the hot springs near Mammoth Lakes!